Security Settings
Changes to security related configurations, such as token expiration time or what servers the applications can make requests from, are set in Security Settings.

Tip: If you want to hide or expand one of the sections, click the square at the end of the section name.
Usage
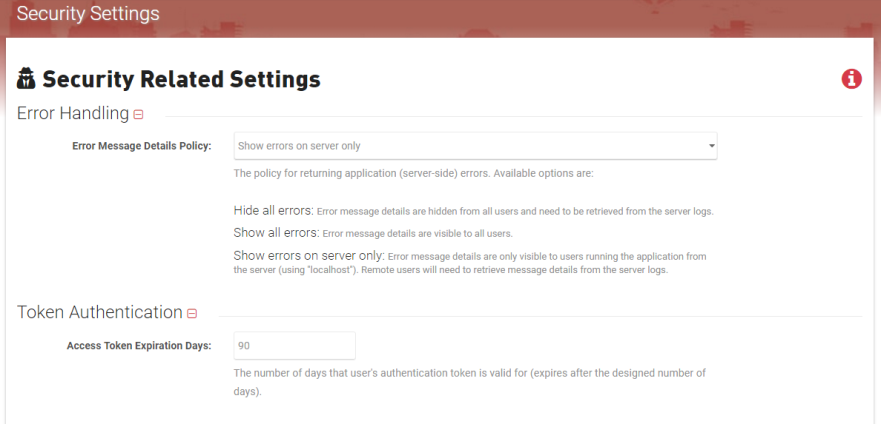
Error Message Details Policy
This sets the policy for returning application (server-side) errors. When errors are hidden, the application will give a generic "An error occurred" message, but when errors are shown the user will get a detailed error message. Available options are: Hide all errors, Show all errors, and Show errors on server only.
To Use:
- Select the desired option from the dropdown.
- Click Save at the bottom of the page.
This sets the number of days that a user can stay logged in without needing to sign in.
To Use:
- Enter the desired number of days.
- Click Save at the bottom of the page.
Enabling this will re-issue a new cookie with a new expiration time when a request is made more than halfway through the expiration window.
To Use:
- Check/uncheck the box beside Enable sliding expiration for authentication cookies.
- Click Save at the bottom of the page.
This prevents the default behavior of the application forcing all users to re-authenticate the next time they sign into the application when changes are made to any role or role's privileges.
To Use:
- Check/uncheck the box beside Prevent auto sign out feature.
- Click Save at the bottom of the page.
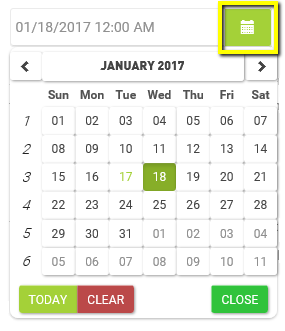
This sets the date and time all tokens will expire, so that all users must be re-authenticated.
To Use:
- Click the calendar and select a date.

Tip: The time will be defaulted to 12:00 AM unless changed.
- Or Enter in the desired date and time.
Heads Up! The expected format is MM/dd/yyyy h:mm a.
- Click Save at the bottom of the page.
This sets the number of hours the link to reset a user's password will remain valid.
To Use:
- Enter the desired number of hours.
- Click Save at the bottom of the page.
Sets the SameSite cookie to none to indicate that same site restrictions should be disabled by the client and to allow cross-site cookie use. When using TDS (or any of the applications within TDS) in an iframe, it may experience issues if using sameSite=Lax or sameSite=Strict cookies, because iframe is treated as cross-site scenario. Hence, its recommended to disable it and set the same-site mode to 'None'. Note: Cookies that assert SameSite=None must also be marked as Secure. In this case, TDS will need to be secure site accessed using 'https'.
To Use:
- Check/uncheck the box beside Disable same site mode for cookies authentication.
- Click Save at the bottom of the page.
These options allow you to specify what servers the application(s) can make requests from. For more information: HTTP access control (CORS).
Example: If you have tds on one server and Road Analyzer on a separate server, this will allow Road Analyzer to make requests to the server tds is on. Enter "*" to allow requests from all servers, or enter in the specific server(s) that you will allow requests from.
To Use:
- Enter the Allowed CORS Origins, Headers, and/or Methods.
- Click Save at the bottom of the page.
The System Admin is built-in and has global access to everything no matter what role/privilege they are in and will be available no matter security you choose for the application. If you used the Configuration Wizard this will already be filled in.
To Use:
- Enter the desired System administrator "username".
- Click Save at the bottom of the page.
You can select the role name that has the privileges anonymous users will receive.
To Use:
- Select the desired role name from the Anonymous access role name dropdown list.
- Click Save at the bottom of the page.
You can select whether or not to have the role privilege mapping to be handled automatically within the application itself, or be based on the suggested privilege levels and semantically defined role types you set.
To Use:
- To enable, check the box beside Auto-managed role privileges.
- Click Save at the bottom of the page.
You can assign roles to admin and standard users with default privileges. If you install any new applications, these roles will be automatically assigned privileges.
Heads Up! If you are using Active Directory or Security Token Service your Role Names for these groups must match the equivalent role name in your Active Directory or Security Token Service. If they do not, the application will not recognize you and will be locked out.
To Use:
- Select the desired Role Name from each of the dropdowns.
Note: The options available in the dropdowns for these roles are from the Roles section. If you do not want a role, you can select Prevent automatic privilege assignment options.
- Click Save at the bottom of the page.
You can set the role name that will be assigned to all new users or prevent automatic assignment of a role.
To Use:
- Select the desired Role Name from the dropdown.
Note: The options available in the dropdowns for these roles are from the Roles section. If you do not want a role, you can select Prevent automatic privilege assignment options.
- Click Save at the bottom of the page.
To create a user account for external users, enable this setting. With Just-in-time (JIT) provisioning, an internal application user will automatically be created based on the external user information.
To Use:
- To enable, check the box beside Enable Just-in-time provisioning.
Note: The options available in the dropdowns for these roles are from the Roles section. If you do not want a role, you can select Prevent automatic privilege assignment options.
- Click Save at the bottom of the page.
In Users and User Roles, this will set the maximum number of users the application will search for and display in the list.
To Use:
- Enter the desired number of users.
- Click Save at the bottom of the page.
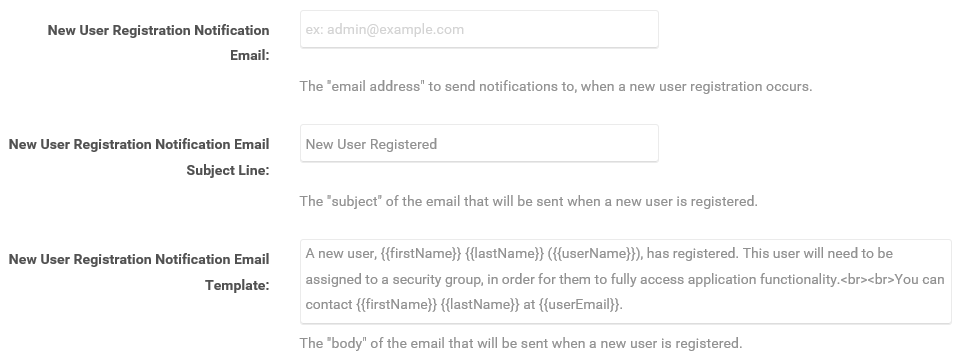
When a new user registers in any of the TDS applications an email will be sent if the following information is filled out. Further configure this email content by adjusting the subject line and template to suit your needs.

To Use:
- Enter the desired Email.
- Optional: Edit the default Subject Line and/or Email Template.
- Click Save at the bottom of the page.
In these settings you can specify the subject line and body of the password reset email for your organization.

To Use:
- Enter the desired Subject Line and/or Email Template.
- Click Save at the bottom of the page.

Should you want to reset to default all security settings, click Reset and select Save on the confirmation popup.
Heads Up! Be aware that a few other security settings that are not visible in this form will also be reset.
